Introduction to Programming
A significant part of creating an effective competition robot is programming it. Programming allows you to set the controls, control motors, create autonomous modes, and provide automation that gives your team a competitive edge. In this article, we will mainly go over our programming methodology and process, and will include some basic code. Moreover, we program our robots in RobotC (a version of C), so the following tutorial will not concern any other robot frameworks. This is not a tutorial on how to program and it does not teach everything robotC can do. You can learn C from a variety of different sources. Rather, it is a rough field manual for how to get started programming at an advanced level in robotC.
Getting Started
In order to program, you will need a computer with Windows on it. If you do not have one, there is a desktop computer in the robotics room with all the necessary software on it.
However, if you want to program on your own computer you need to install RobotC, which allows you to download and compile robotics code. You can also write your code here, but we recommend a different editor (like Atom). Next, you will need to install some device drivers onto your machine in order to actually connect to the robot and download source code. See how to do that here.
Helpful Resources:
Vex Forum: If you run into really complex problems and are out of solutions, try asking here! Github: We store all of our source code, and various programming libraries here. Available for use and reference.
Basics
Code Structure
Check out a basic program over at Github. This imports all the necessary files for RobotC, and defines the 3 primary methods/tasks in RobotC: pre_auton(), autonomous(), and usercontrol().
pre_auton defines the code that executes after the robot has paired to the controller and before autonomous starts. It is generally used for initializing variables, setting up sensors, etc.
autonomous is where the code for autonomous modes should be included.
usercontrol is executed after autonomous during the user control period of the game. Generally, there will be an infinite while loop within usercontrol to constantly check controls and perform actions.
Motors
At its core, programming a robot is about controlling a robot’s motors. Here’s how to do that:
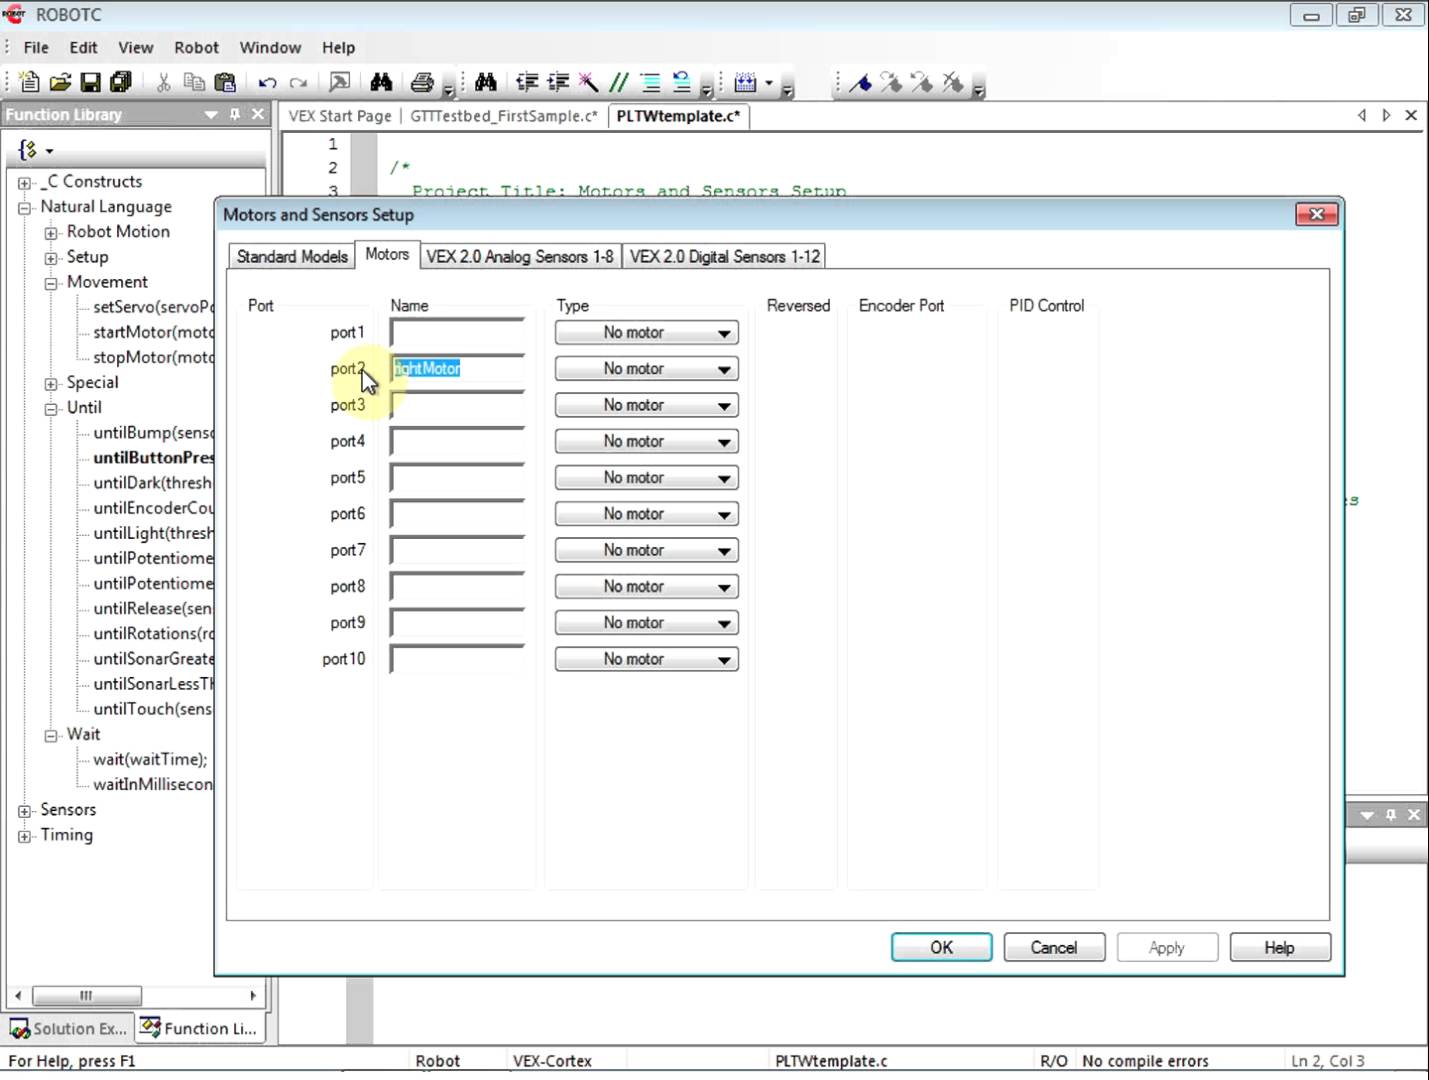
First, set up a motor by clicking “Motor and Sensor Setup” in RobotC. Set up a Motor 393 in the port that motor is plugged into, and give it a name (let’s say M_TEST). You can also reverse a motor in this panel, which reverses its direction.
Next, actually controlling the motor. Motors are controlled by setting their “voltage”. They accept a voltage from -127 to 127 volts, where the larger magnitude voltages make the motor move faster and with more torque, and a voltage of 0 stops the motor. To set a motors voltage:
motor[M_TEST] = 127; //Or whatever voltage you want.
Note, this only sets the motor’s voltage, and does nothing else. So, in this example, if no other code was added, M_TEST would spin continuously at 127 volts. You must change the voltage later to stop it.
For example:
motor[M_TEST] = 127; //Motor turns on for 1 second
wait1Msec(1000);
motor[M_TEST] = 0; //Motor stops
Controls
Another very important thing that requires programming is creating driver controls (i.e. what buttons and joysticks control what movements).
vexRT[CONTROL_NAME] will return that control’s value. You can read either channels (those joysticks on the remote), or buttons. For channels, vexRT[CHANNEL_NAME] will return a value from -127 to 127 corresponding to how far that channel is pressed. For buttons, vexRT[BUTTON_NAME] will return 0 if they aren’t pressed and 1 if they are. The name of each channel and button are written on the remote. Partner joystick controls are appended by “Xmtr2”. For example:
vexRT[Ch1]; //Value of Channel 1
vexRT[Btn6U]; //Value of Button 6U
vexRT[Btn5UXmtr2]; //Value of Button 5U on the partner joystick.
To actually implement controls, constantly monitor these control values within a loop using an if statement. For example:
while(1){ //In user control
  if(vexRT[Btn6U] == 1){
	  //Do something cool when Btn6U is pressed.
  }
}
Putting it all Together
Check out a sample program with controls, motors, and everything else over at Github.
The Way We Code
The bigger picture.
Robotics Library
There’s a lot of the same code we have to write each year, so we’ve created a library that bundles a lot of commonly used features. Its available here (instructions included).
Structuring your Program
While it is completely possible to write all of your robotics code in one file, that is not recommended. We like to split our program up into many smaller files (each of which has a specific purpose), in order to make finding an editing code easier. In general these are the files we like to have:
- main.c - contains the rough structure for the program. Includes everything else. Has pre autonomous, autonomous, and user control methods/tasks inside it.
- main.h - a header file. Contains most global variables, constants, and function wrappers.
- auton.c - a file that contains all the autonomous modes
There should also be various files for each function your robot has. For example, “arm.c” or “grabber.c”. As always, check out our github for source code from past years as reference.
In terms of actual syntax, include a file by writing: #include “path/to/file.c”. In c, this is treated basically the same as if that file was just copied and pasted onto that line. So, order of including matters.
Version Control
Version control is necessary so that all the programmers on the team can have an updated copy of the robotics source code. We use git(hub), so if you aren’t already familiar with that, check out a tutorial here. All of our code is stored on the Github Organization PA Robotics (github.com/PARobotics).
Multithreaded Code
A very important and powerful feature of RobotC is its ability to multitask. Essentially, without multitasking (single threaded programming), code must execute sequentially. So, if you have this piece of code:
functionA();
functionB();
functionC();
Function A must execute before B can, and B must execute before C can. If C takes a long time, the entire robot is held up until it ends. Normally this isn’t a problem (as long as you don’t write functions that never end!), but if you want to do two separate things at the same time, you need multithreading. Here’s the syntax:
task taskA(){
	while(1){
		functionA();
		wait1Msec(1000);
  }
}

task taskB(){
	while(1){
		functionB();
		wait1Msec(1000);
  }
}

task usercontrol(){
	//these need to be included otherwise the tasks won’t run
	startTask(taskA);
	startTask(taskB);
}
In this example, functionA and functionB are running at the exact same time. To control tasks (like parameters in a function) or to share information between tasks use global variables.
We like to use tasks to monitor individual parts of the robot (say a user control task, a task for an arm, etc.), but make sure not to use too many tasks (less than 5 is good, but you can safely go up to 15ish), because that will hog memory and make the robot run more slowly.
Moving Forward
This tutorial has only scratched the surface of programming. Continue your learning by experimenting on the testbenches, reading old code on github, shadowing a head programmer, or writing some code for a robot.